Sequence Read Archive
DRA Submission
- Submission of research data from human subjects
- For submitting data from human subjects (human data) to the databases of DDBJ center, it is submitter’s responsibility to ensure that the dignity and right of human subject are protected in accordance with all applicable laws, ordinances, guidelines and policies of submitter’s institution. In principle, make sure to remove any direct personal identifiers of human subjects from your data to be submitted. Before submitting human data, read the “Submission of research data from human subjects”.
The following data types require specific submission procedures. Please refer to the dedicated pages.
Submission flow
- Create a DDBJ account
- Create a new submission
- Upload data files
- Submission status
- Submit a BioProject
- Submit BioSample(s)
- Submission
- Enter Experiment/Run metadata
- Data file validation
- Accession number
Create a submission account
Create a DDBJ account and register a public key to your account.
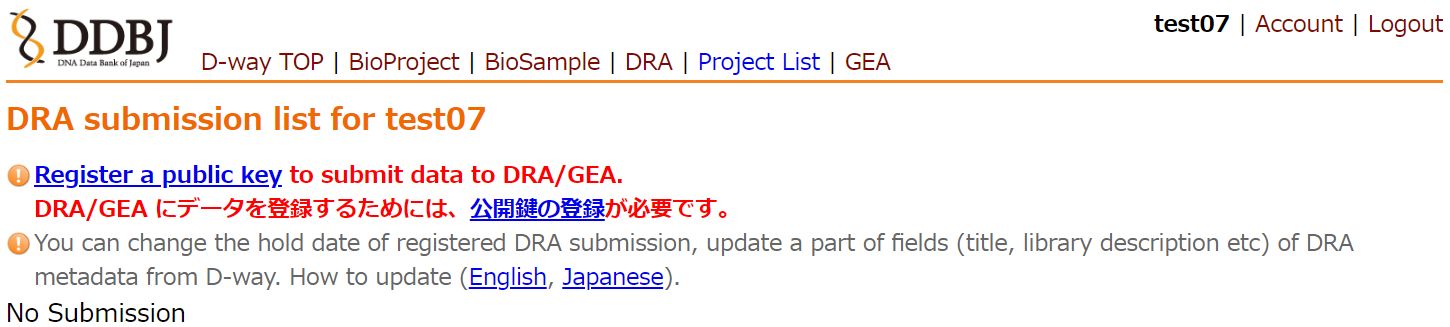
When accessing the DRA submission site without a registered public key associated with your account, the following warning will be displayed. Please register your key by following the instructions at Registering a Public Key for Authentication.
Create a new submission
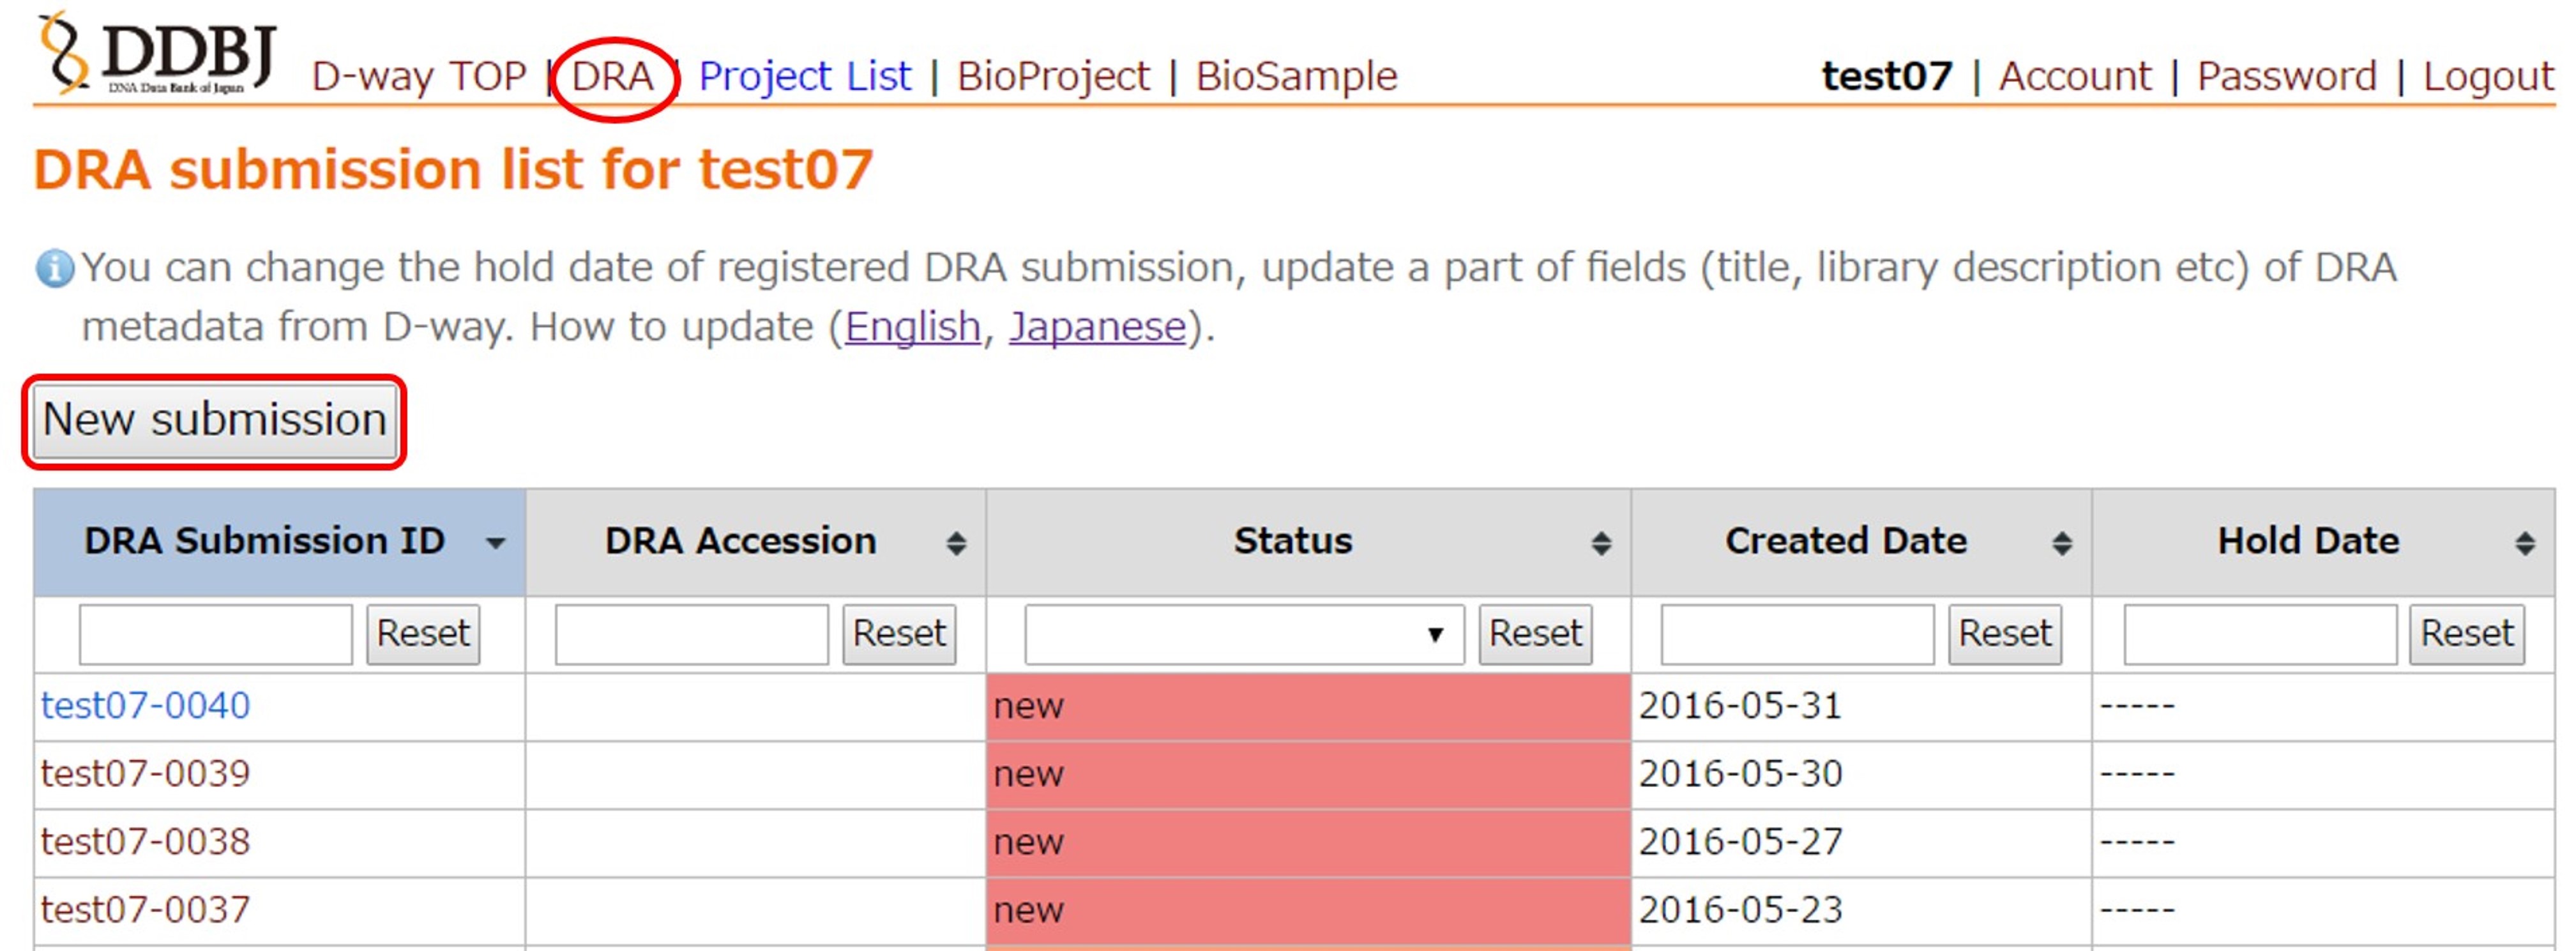
Login D-way and move to the DRA submission list page from the top menu.
Create a new submission by [New submission]. A submission directory (e.g. test07-0040/) is created under the submitter’s home in the file server (ftp-private.ddbj.nig.ac.jp). Upload data files to the directory.
- If there is no reply for more than three months, your submission will be cancelled.
- All data in a submission are released at the same time. If you want to release data at different time, please divide a submission.
- Maximum numbers per submission are, BioSample:1,000, DRA:2,000 (Runs) and GEA:1,000 (Assays). If there are objects more than the limits, please create submissions which reference the same BioProject.
Upload data files
Upload data files to the submission directory (e.g. test07-0040/) on the file server. Please see “Data upload” regarding how to upload your data files.
Submission status
Progress of your submission is indicated by its submission status. The DRA team reviews submission whose status is in “Submission Validated” or “Data Error”.
| Status | Explanation |
|---|---|
| New | Metadata are not submitted. |
| Metadata Submitted | Metadata have been submitted. |
| Data Validating | Validating data files. |
| Data Error | An error is detected in data file validation. |
| Submission Validated | Metadata and data file are validated. |
| Completed | Accession numbers are issued. |
| Private | Data files for distribution are created and the submission is kept private. |
| Public | Released. |
| Canceled | Submission is canceled. |
Metadata registration
The DRA metadata are composed of objects (Examples of metadata organization). External BioProject and BioSample records are referenced from DRA.
- Submission (DRA)
- BioProject
- BioSample
- Experiment (DRA)
- Run (DRA)
- Analysis (DRA, optional)
Please submit metadata in either of two ways, “Register metadata by using the web tool” or “Register metadata by using the excel”. The excel is recommended for a large-scale submission.
Metadata submission by using the web tool is explained below.
Move to the submission page from the submission ID link (e.g. test07-0040).

Run the metadata submission tool at [Enter/Update metadata].
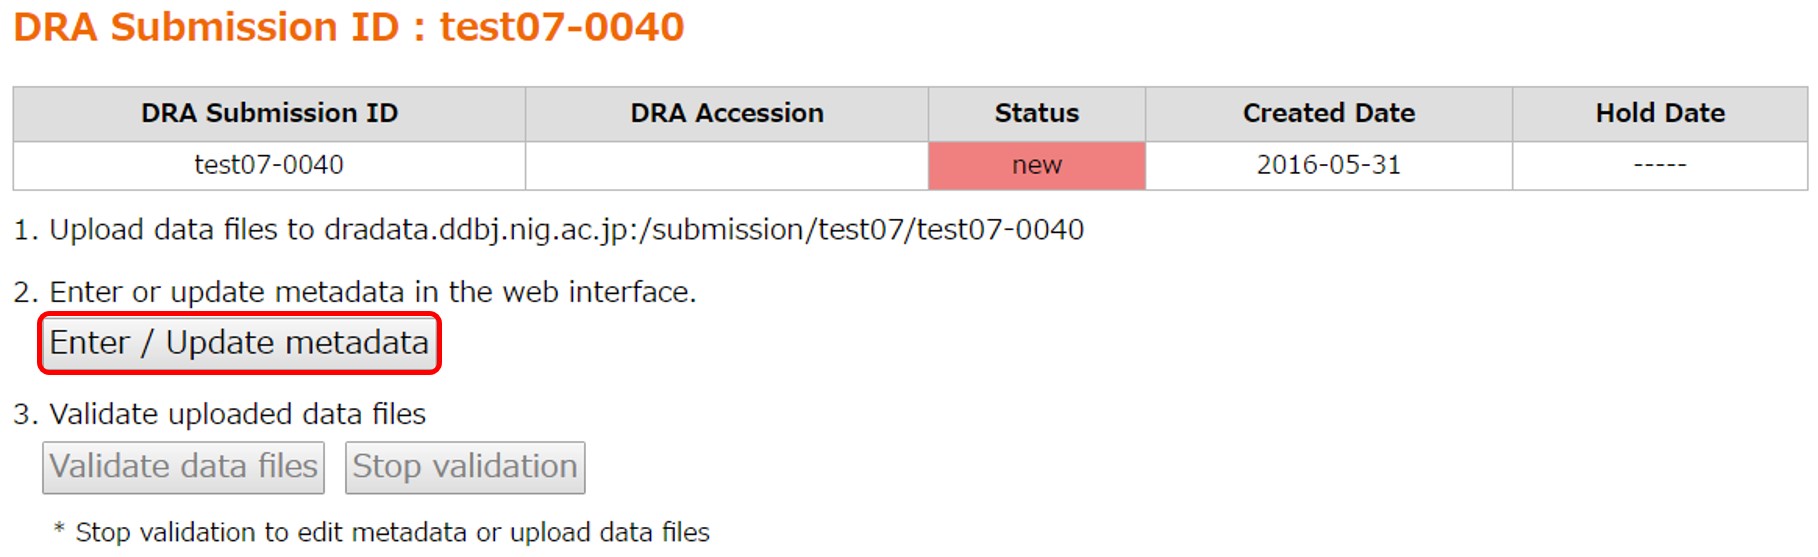
When no file is uploaded, following message is displayed. Upload data files before submitting metadata.

Enter metadata fileds in English. Required items are marked with *. The content is checked every time you click the [Save] or when moving to the other tab. When error messages are displayed, revise the content.
The web tool supports metadata input in the tab-delimited text (tsv) file. Please see the metadata tsv sheet for examples.
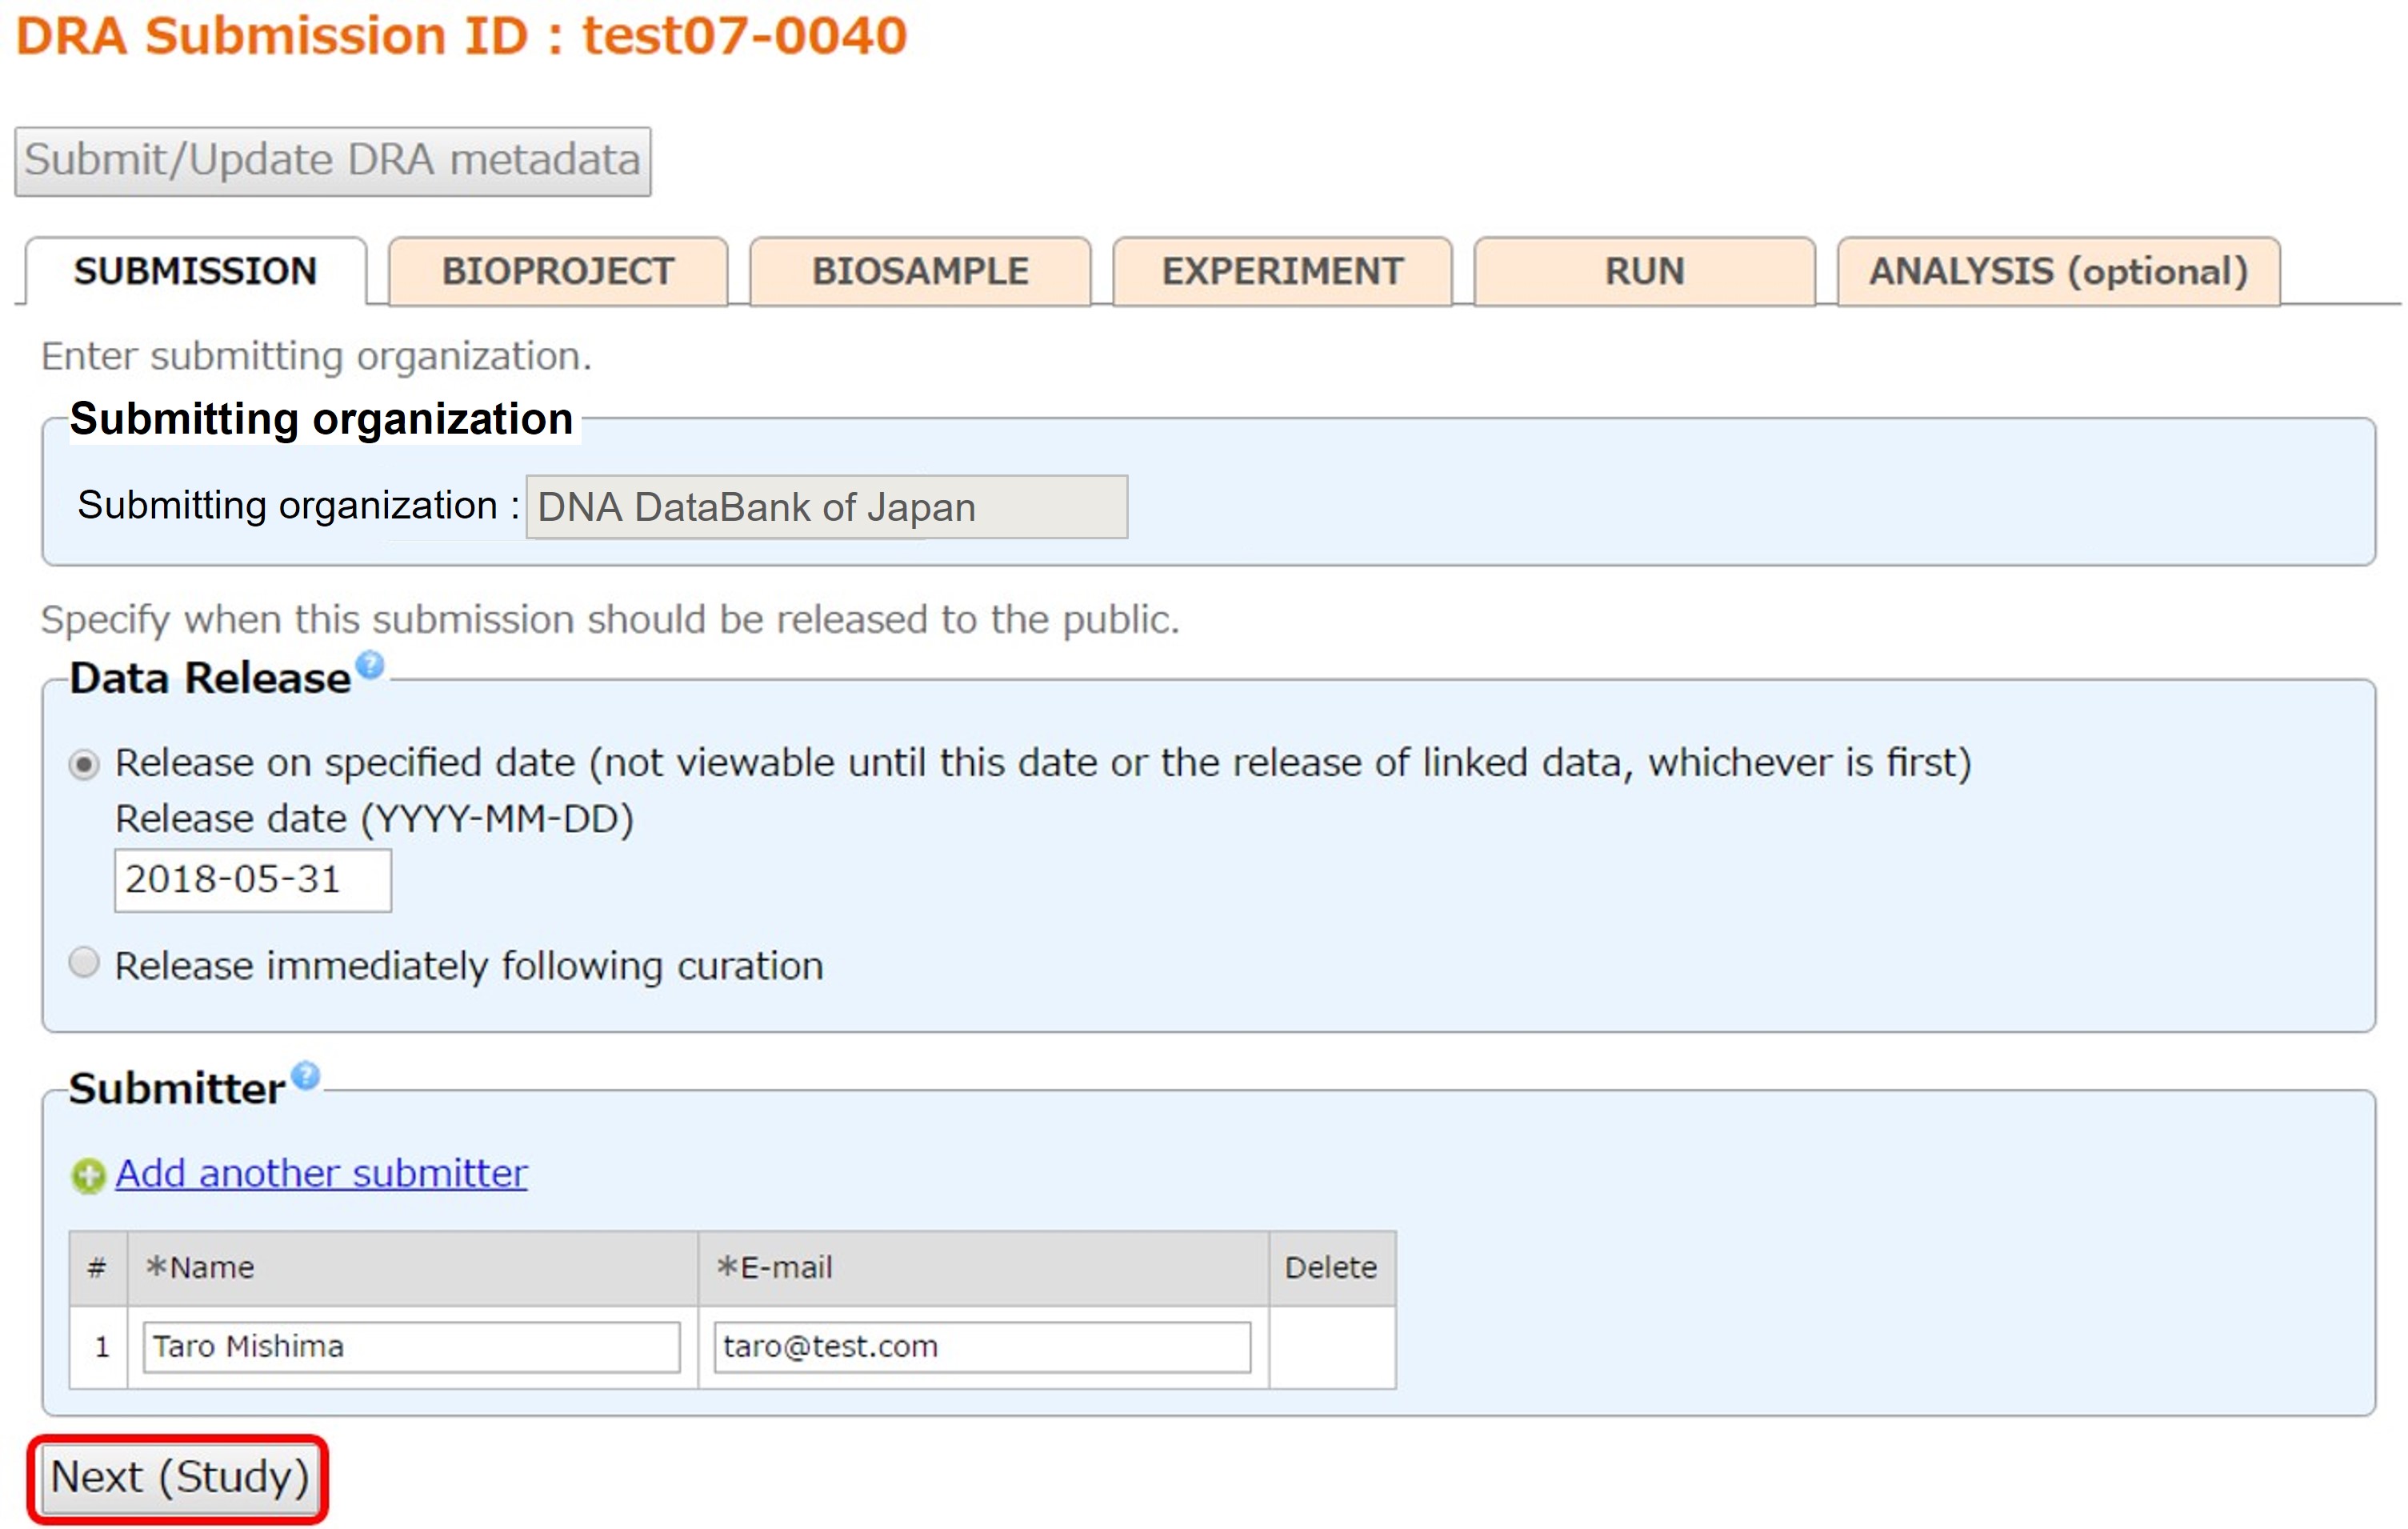
Submission
Enter submission information such as data release and submitters. The organization of your account is copied to the Submitting organization (former center name).
BioProject
BioProject may not display properly in your browser. If this happens, please try using your browser’s private mode or switch to a different browser (Microsoft Edge has been reported to work well in some cases).
Select a project registered in your account or submit a new project from [New submission]. To reference a BioProject registered in another account, please apply cross-reference.
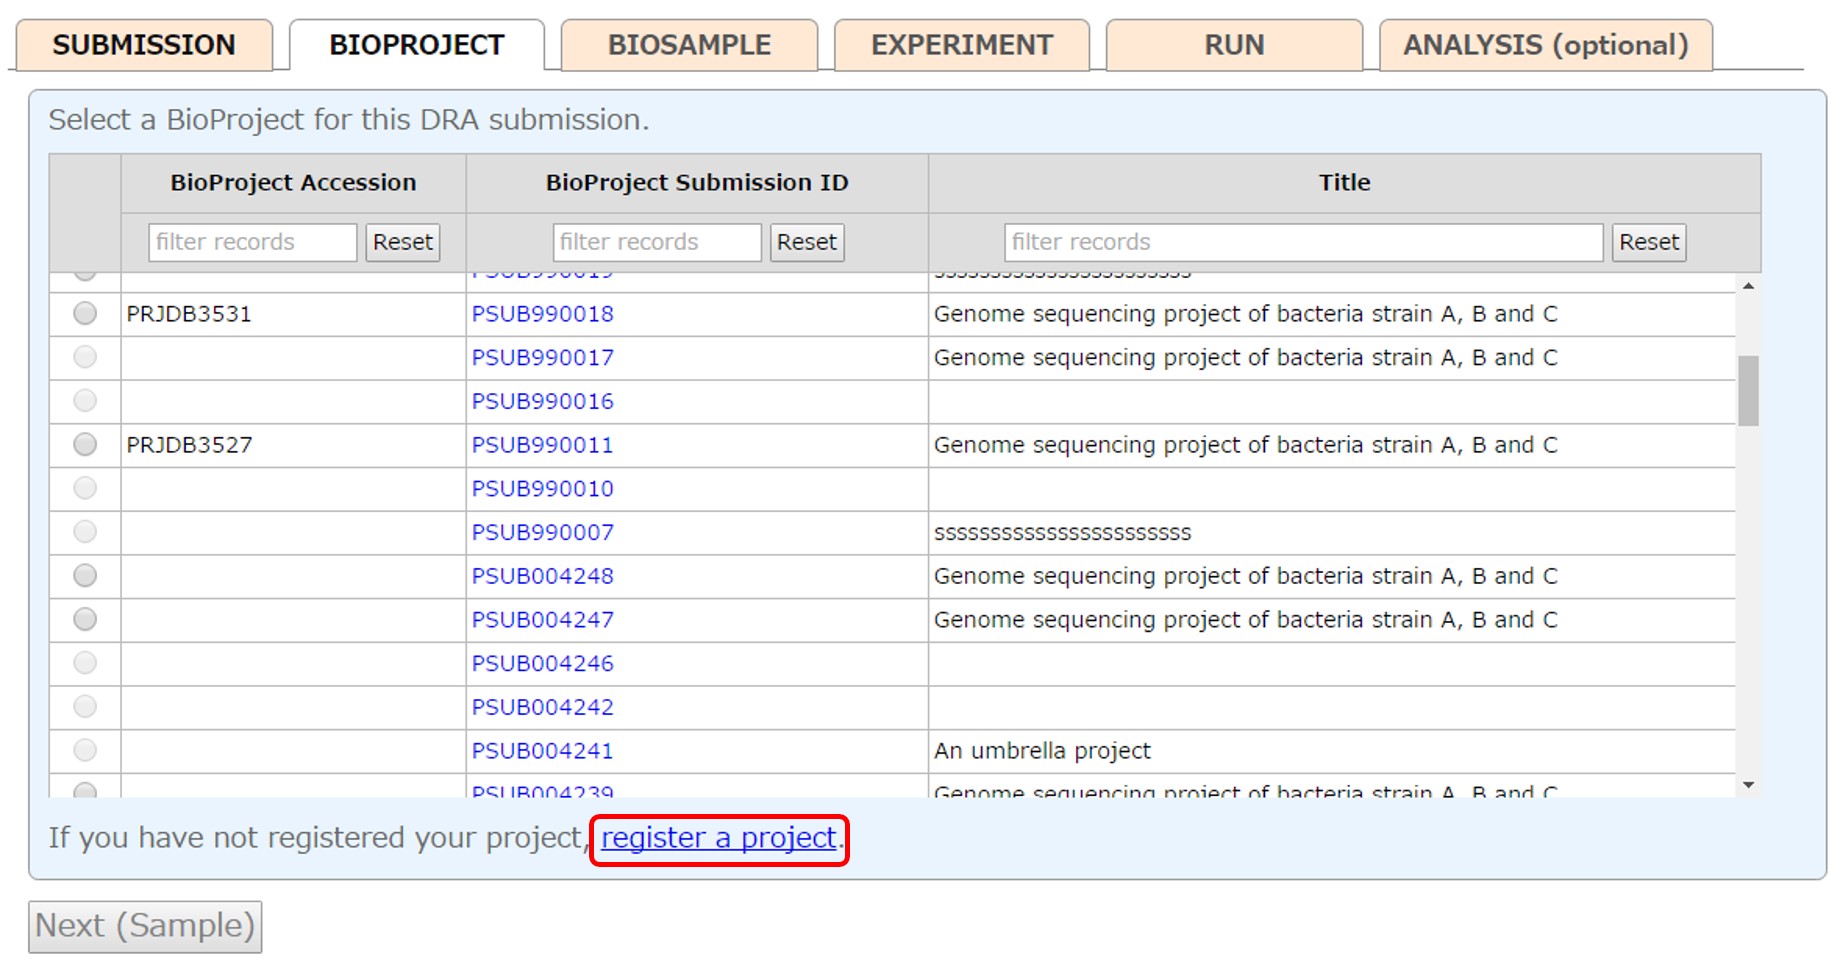
Please see “Project Submission” for how to submit a project. The submitters and hold/release of the DRA submission are copied to the project.
After submitting a project, the submitted project is selected.

BioSample
BioSample may not display properly in your browser. If this happens, please try using your browser’s private mode or switch to a different browser (Microsoft Edge has been reported to work well in some cases).
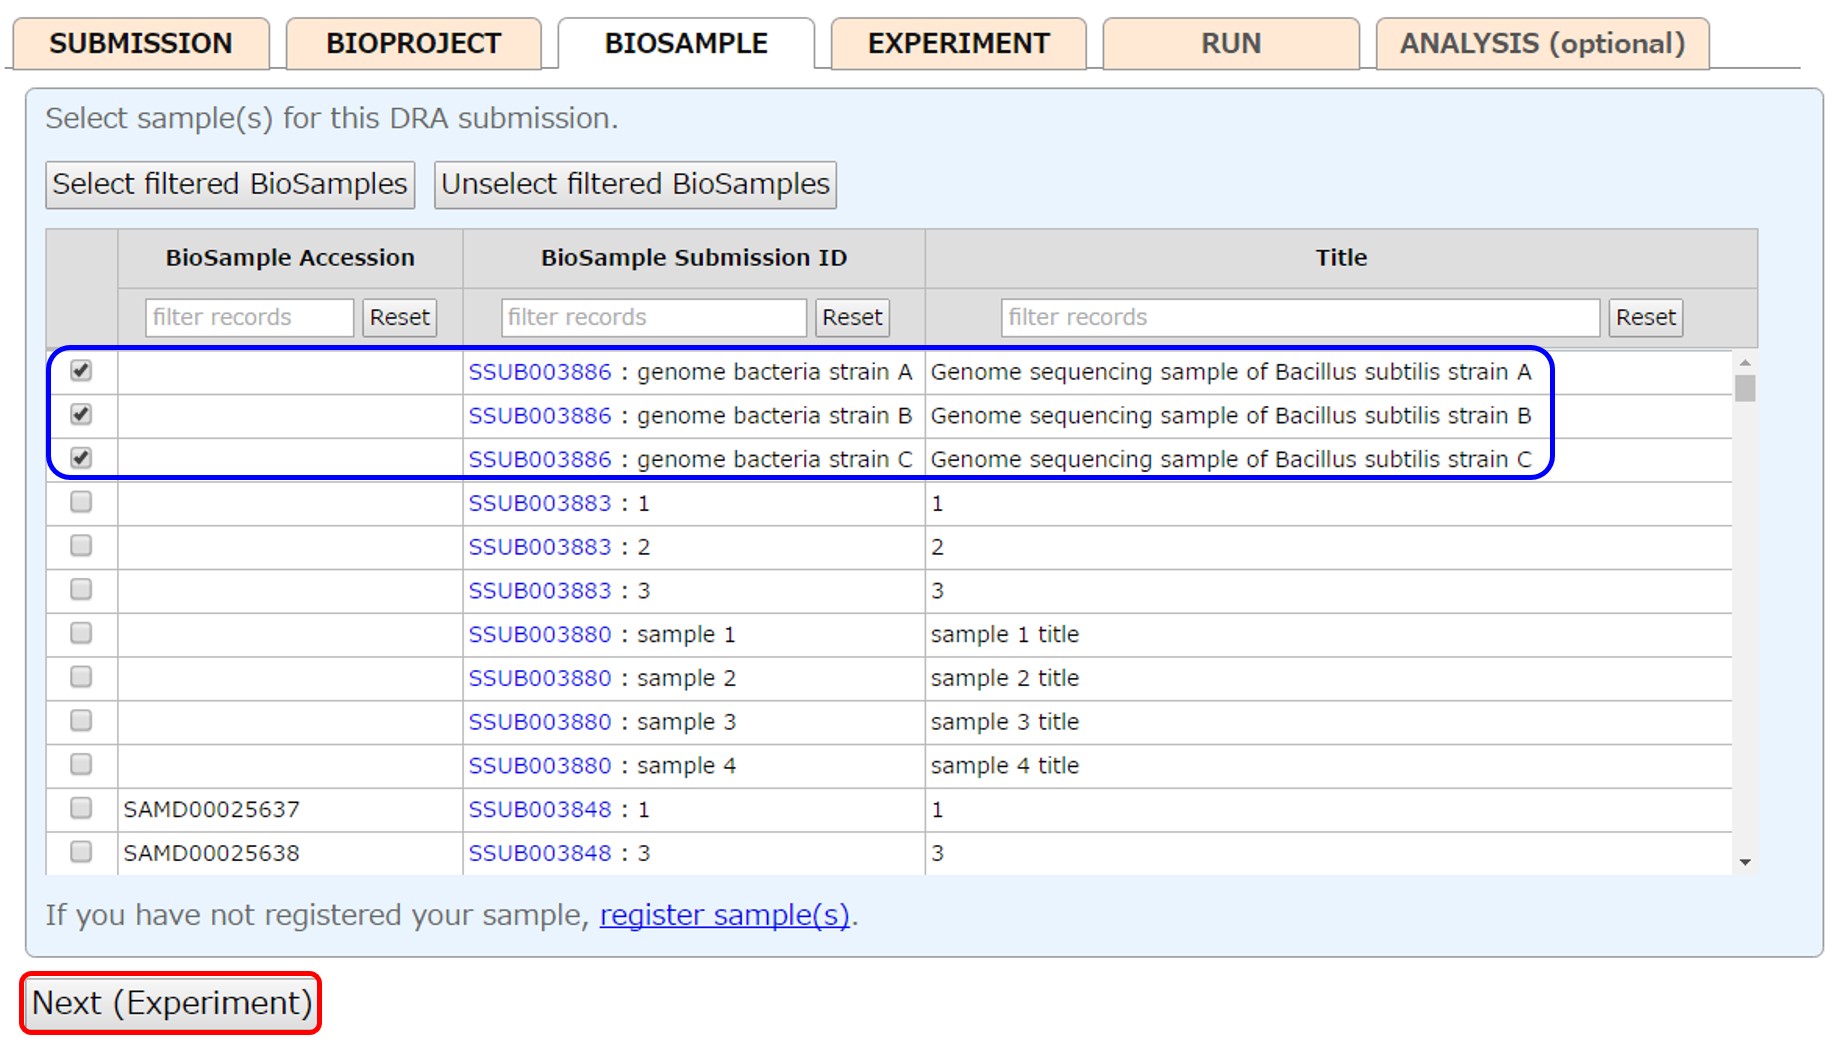
Select samples (more than one sample is common in the DRA submission) registered in your account or submit new samples from [New submission]. To select a range of samples, check a checkbox and click next box with pressing “Shift” key. Filter samples by entering text in the upper box, and click [Select filtered BioSamples] to select all filtered samples. To reference BioSamples registered in another account, please apply cross-reference.
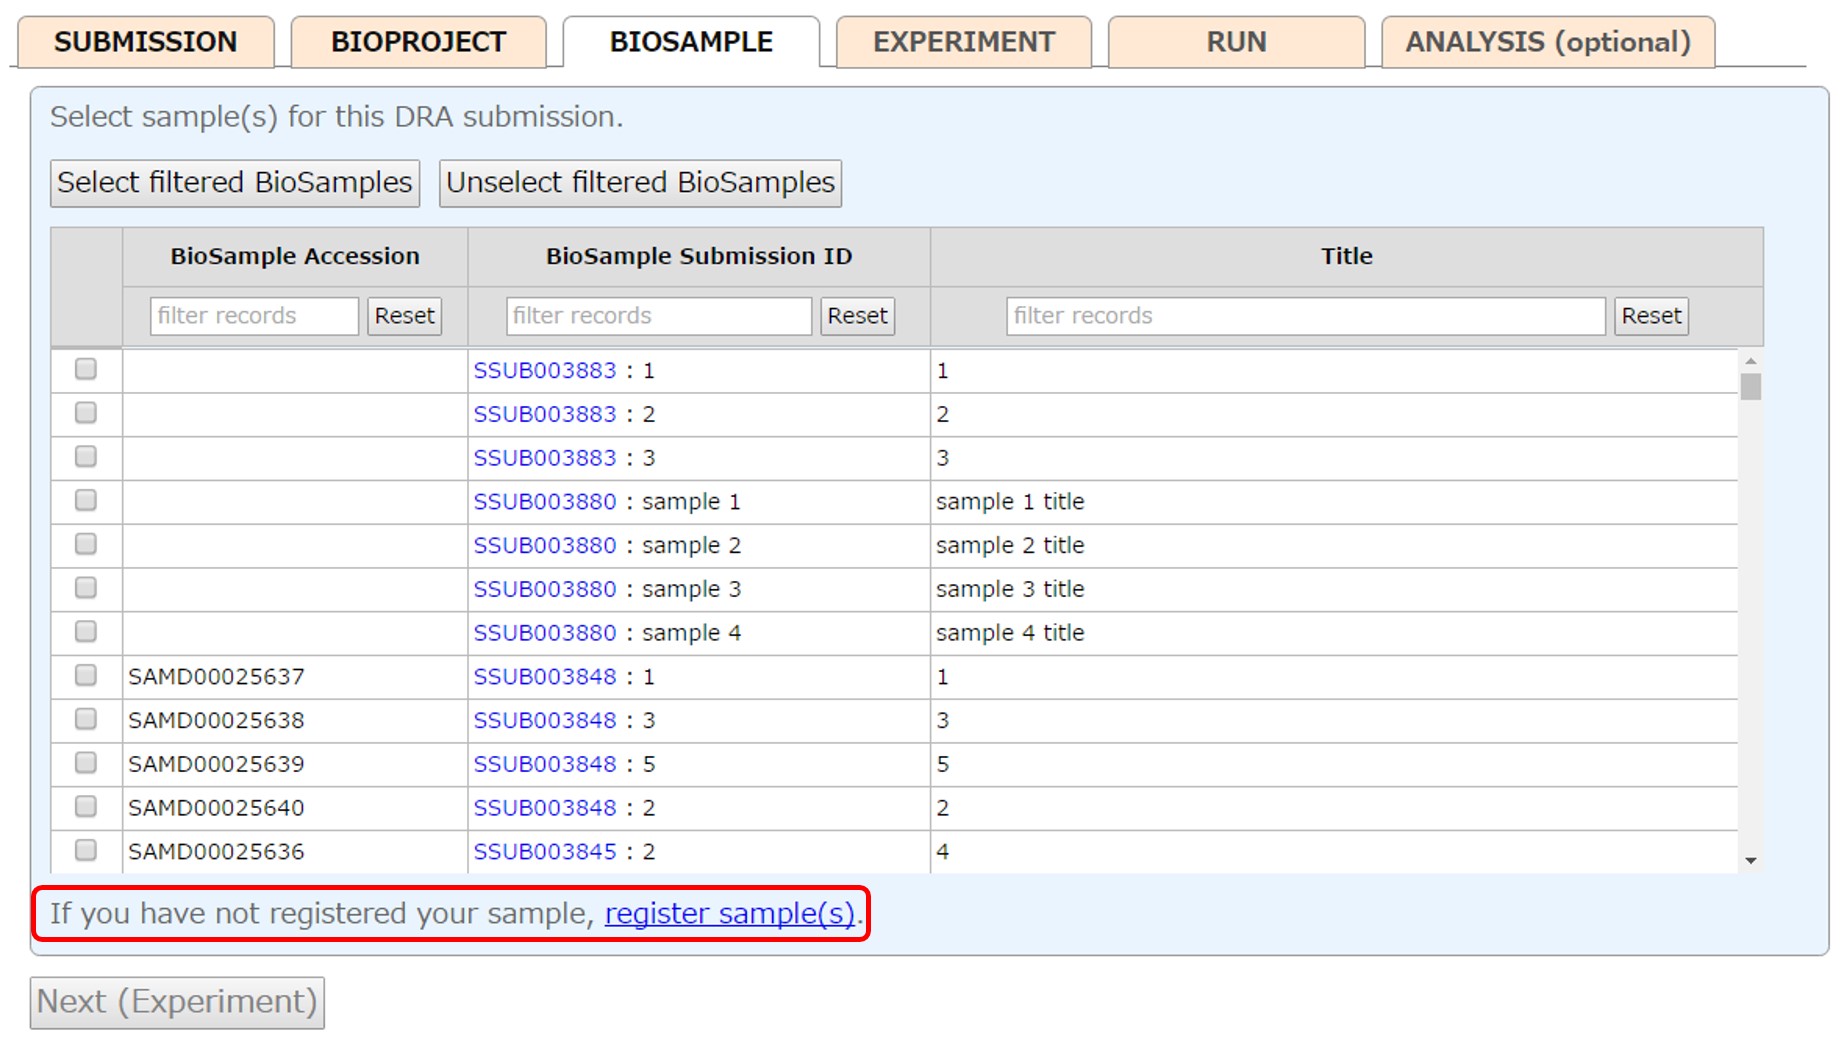
Please see “Sample Submission” for how to submit samples.
After submitting BioSamples, the submitted BioSamples are selected.
Experiment
The same number of Experiment and Run as the BioSamples are created. Each BioSample-Experiment-Run are referenced. The Experiment and Run are automatically generated when the Experiment tab is first displayed.
Auto-generation of Experiments and Runs after selecting three BioSamples.
| BioProject | - BioSample (1) | - Experiment (1) | - Run (1) |
| - BioSample (2) | - Experiment (2) | - Run (2) | |
| - BioSample (3) | - Experiment (3) | - Run (3) |
Add an Experiment by [Add new Experiment(s)]. Delete an Experiment by [Delete]. An Experiment referenced by a Run cannot be deleted.
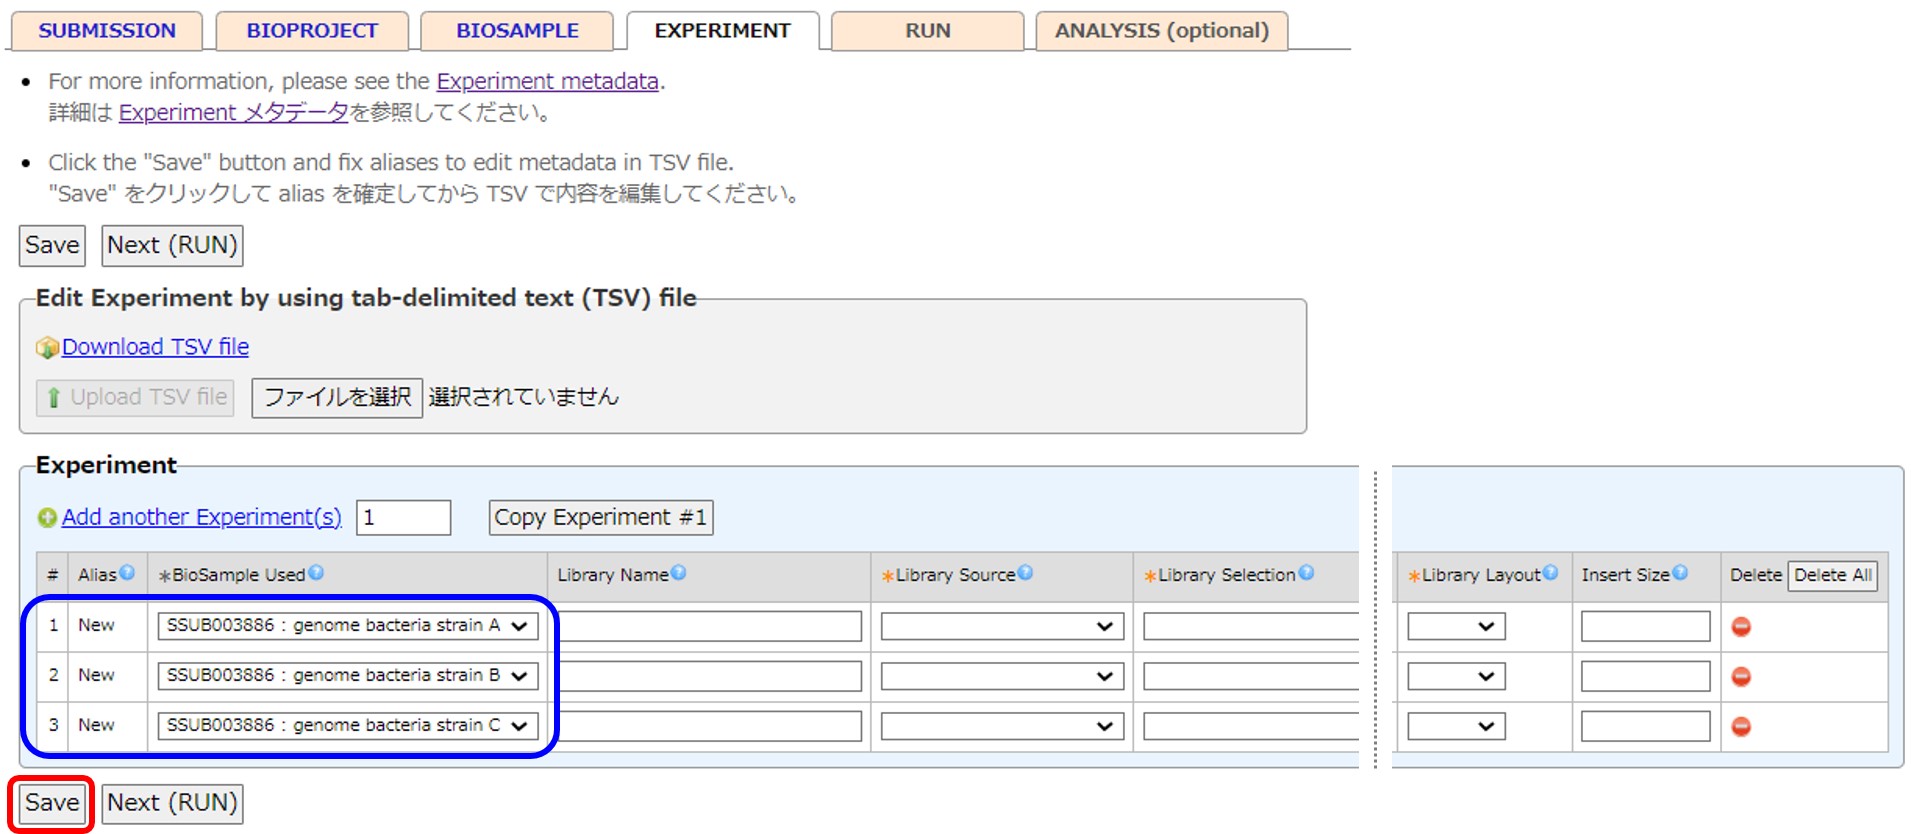
Experiments can be entered by using a tab-delimited text (tsv) file. First save and fix Aliases (names of objects before accession number assignment, e.g. test07-0040_Experiment_0001-0003) by [Save]. Then download content into a tsv file by [Download TSV file].
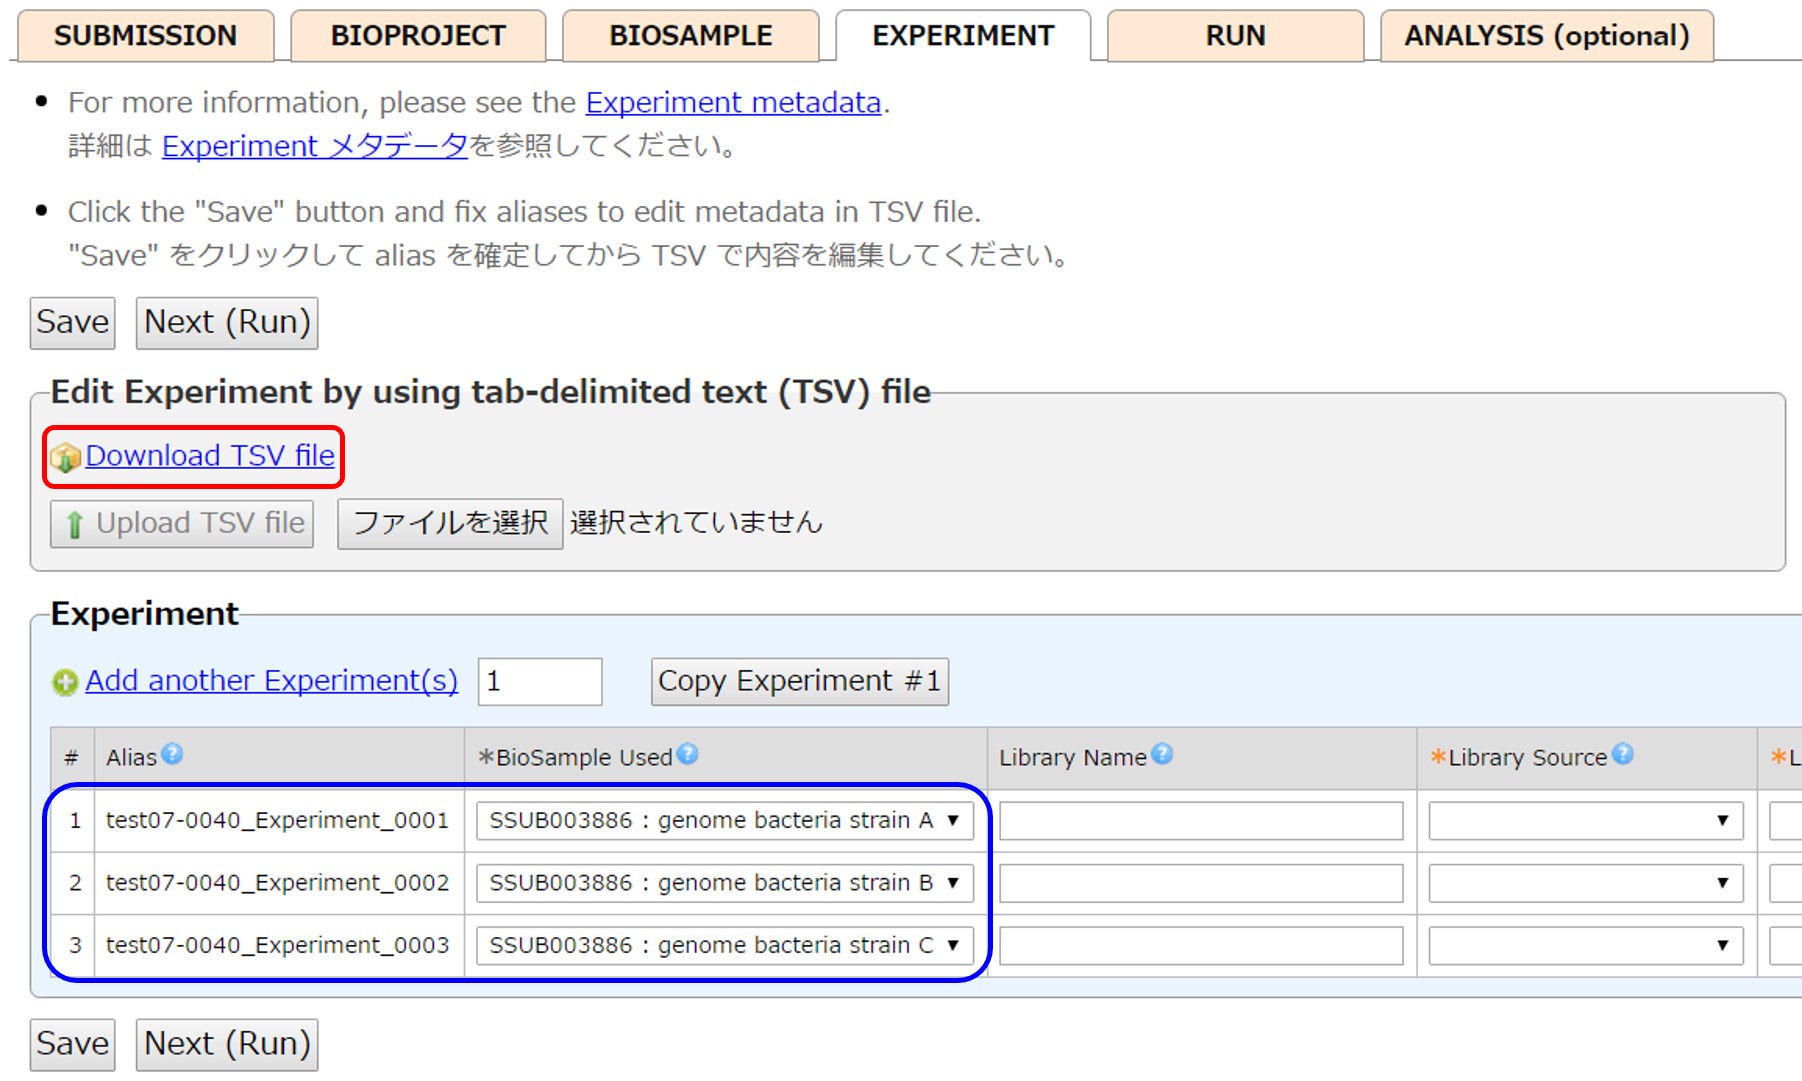
Enter metadata by using a spreadsheet software such as Excel.
If the “Title” is empty, it is automatically constructed as
“[Sequencing Instrument Model] [paired end] sequencing of [BioSample ID]” (e.g., “Illumina HiSeq 2000 paired end sequencing of SAMD00025741”). It is recommended to provide a user-defined title in “Title”.
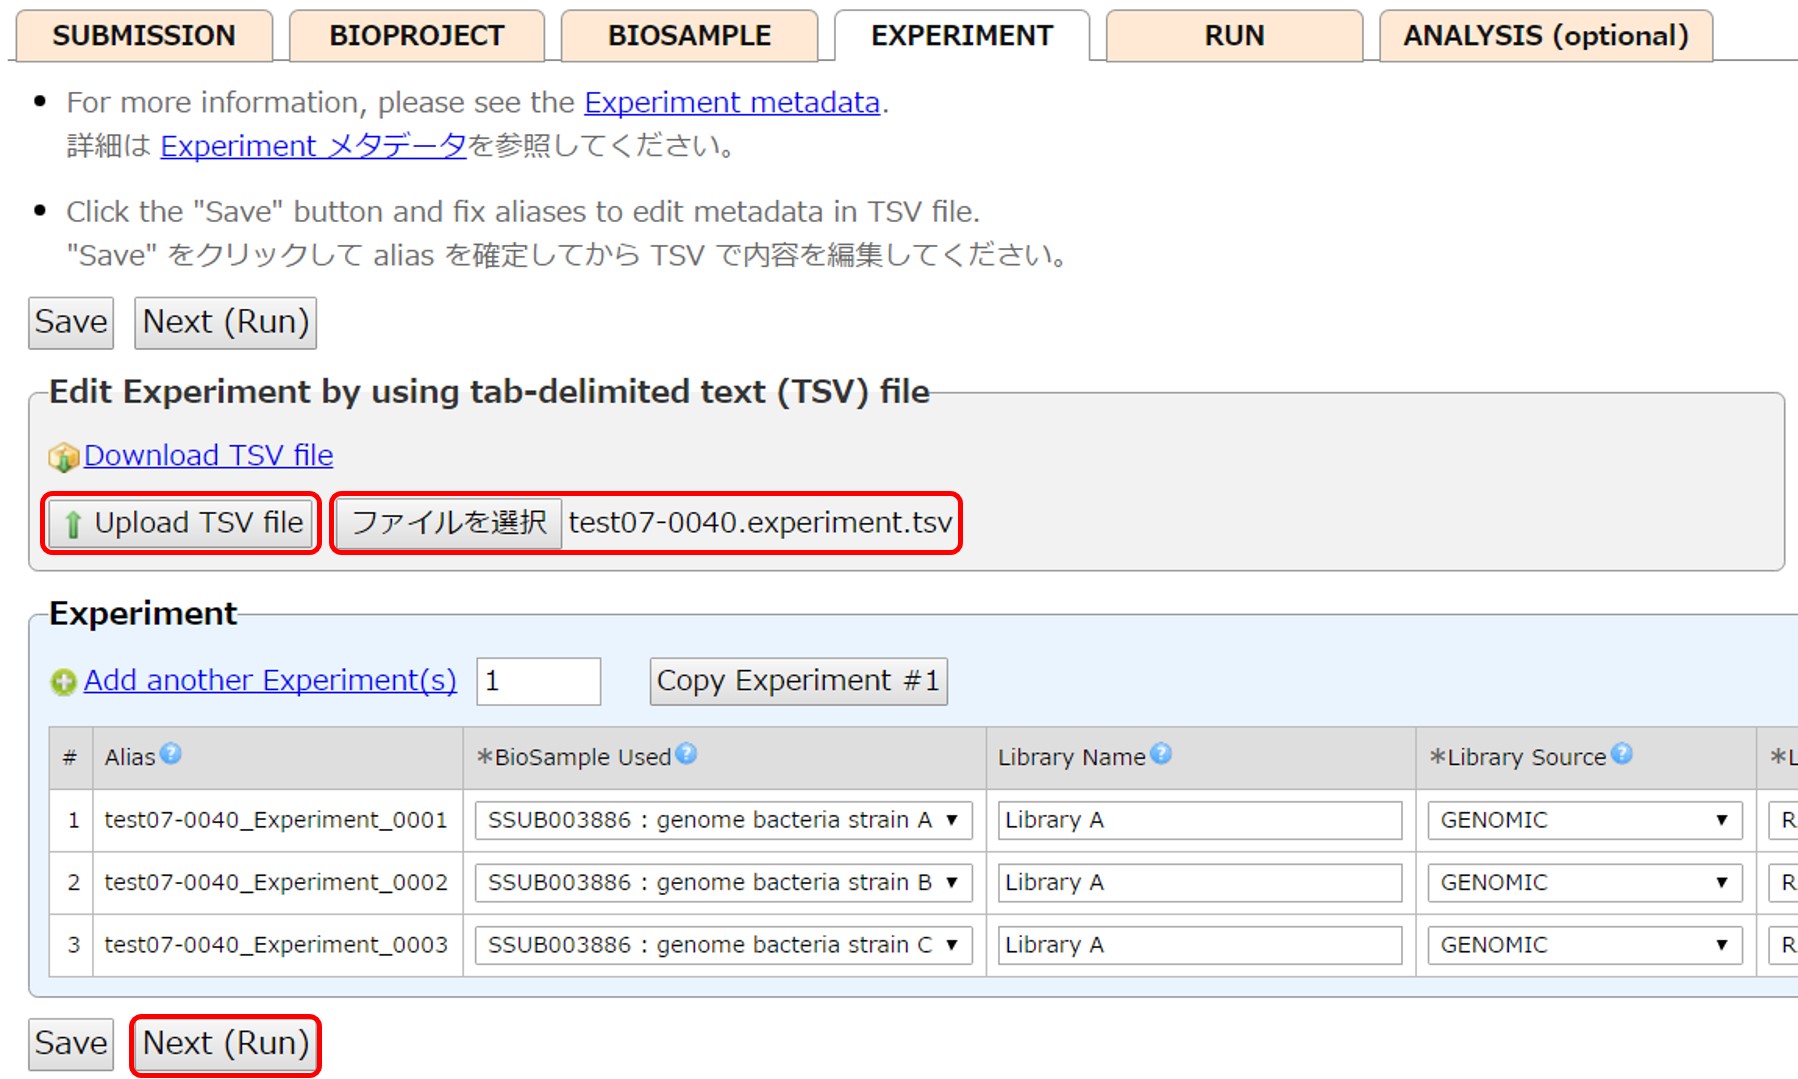
Reference samples in “BioSample Used” by their SAMD accessions (example, SAMD00000001) or “SSUB BioSample Submission ID” : “Sample name” (example, SSUB003746 : Genome bacteria strain A). Spaces around “:” are ignored.

Save enterted content as a tsv file and select and upload it by [Upload TSV file].
Run
The same number of Runs as Experiments are created, and each Run references each Experiment.
In the example, three Runs are created, and each Run references each Experiment.
Add a Run by [Add another Run(s)].
Delete a Run by [Delete]. A Run linked to files cannot be deleted.
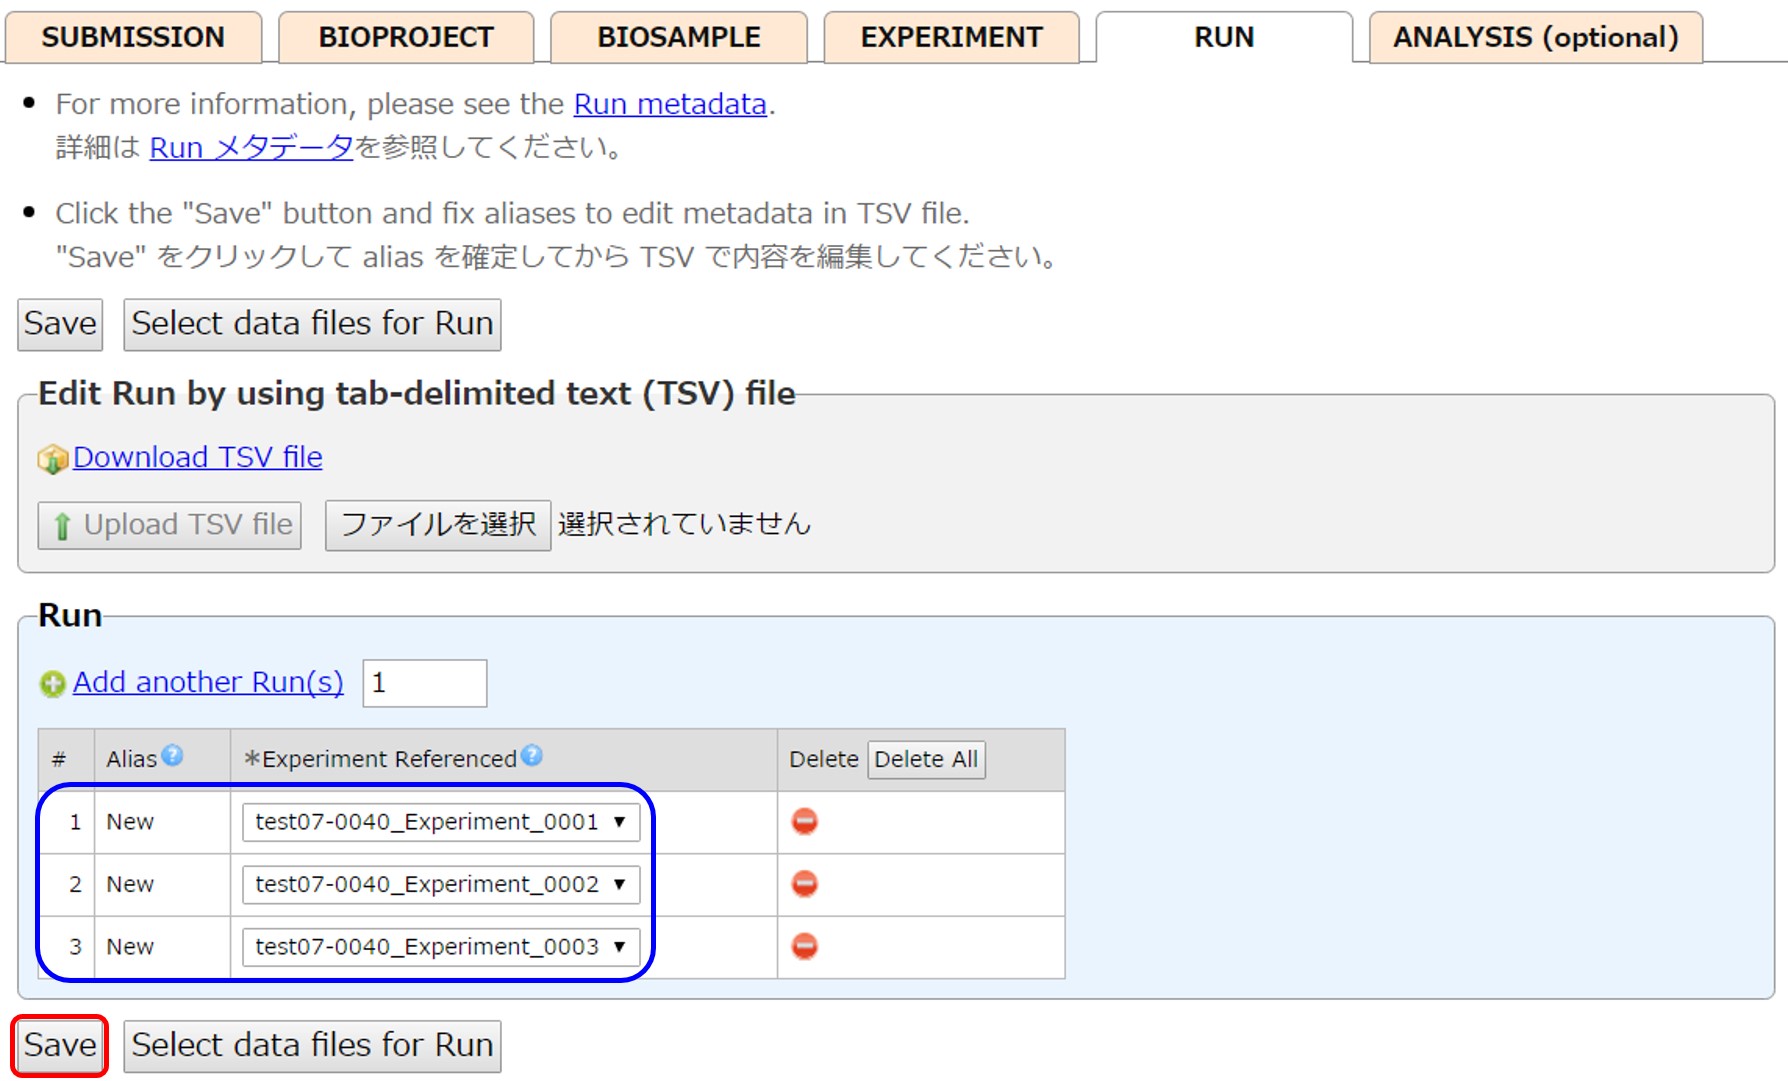
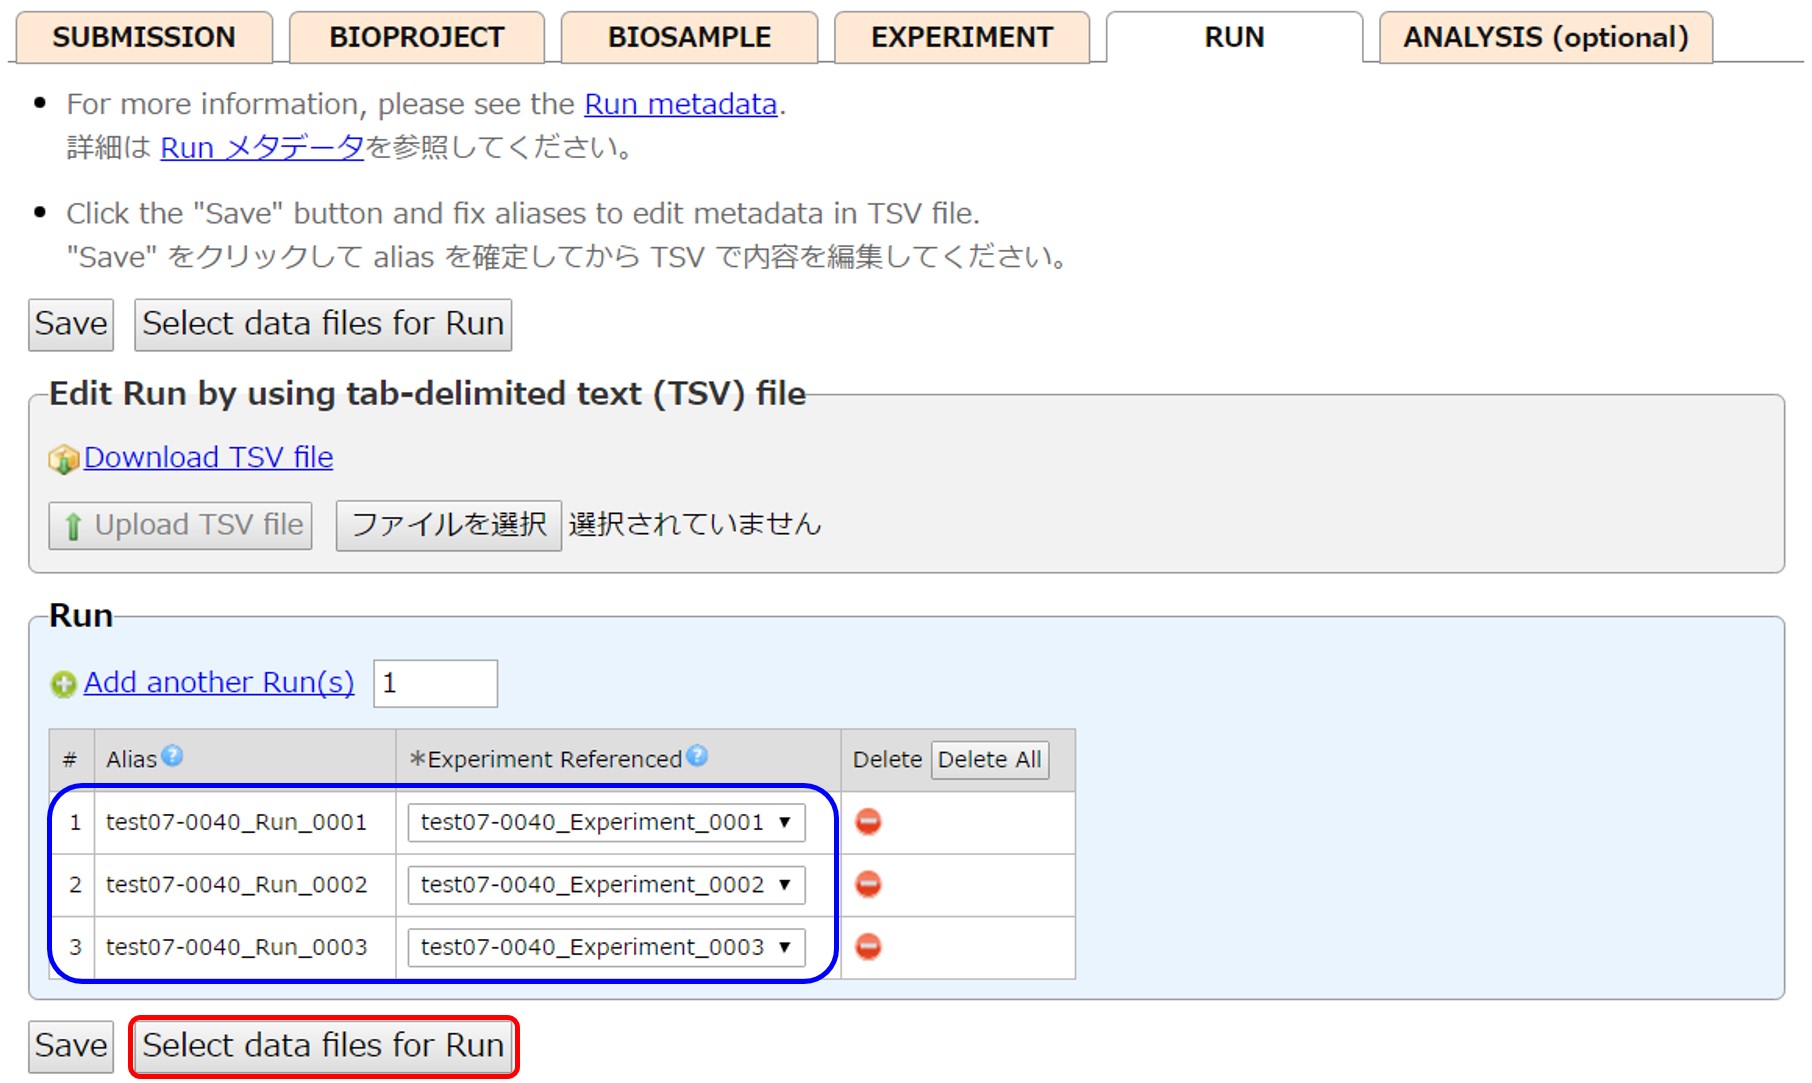
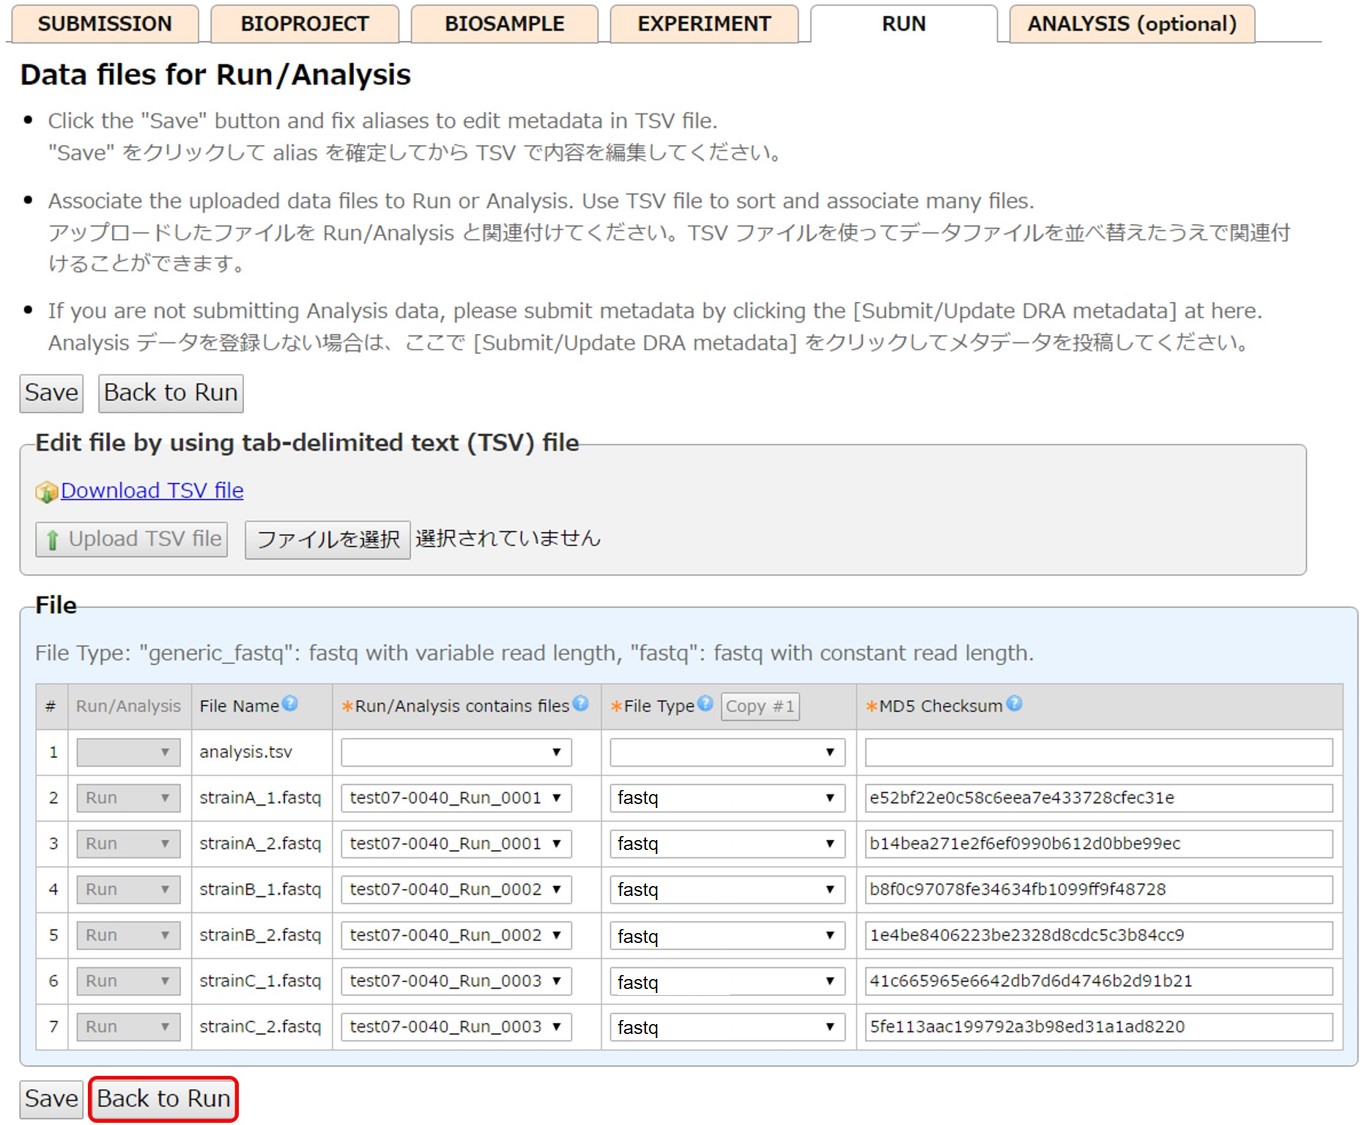
After fixing aliases by [Save], the run content is downloaded into a tsv file. To distinguish the data files, enter “Run” in the leftmost “Run/Analysis” field.
Click [Select data files for Run] and link the uploaded files to Run.
All files uploaded to the submission directory are displayed. Associate a file to a Run by selecting a Run alias in “Run/Analysis contains files”.
Enter File type and MD5 Checksum of the files. File information can be entered by uploading a tsv file.
When an Analysis (optional) is not necessary, submit metadata by [Submit/Update DRA metadata].

After submitting the metadata, validate the data files. Click the link “Validate uploaded data files to finish this submission”.

Analysis (optional)
You may submit data files derived from raw reads to Analysis when there is no appropriate database to submit the derived data. Please note that Analysis is not shared with NCBI and EBI.
Please check appropriate databases in “Submission Navigation” and “Databases and Data Submission Systems”.
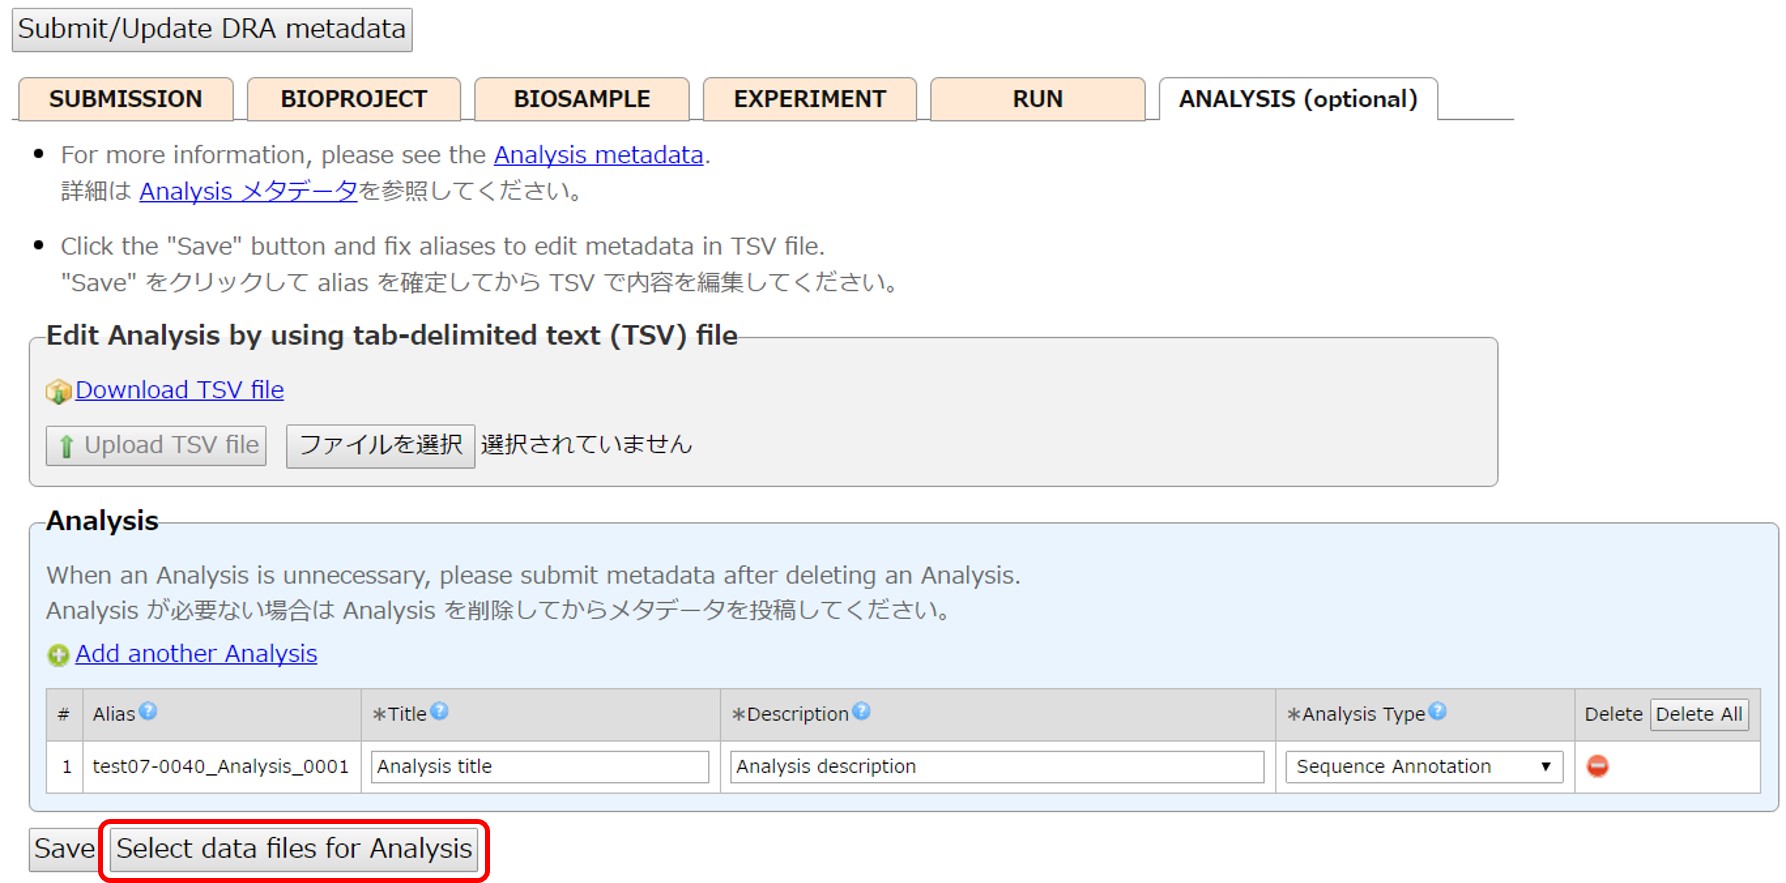
Create Analyses and enter their content. Unnecessary Analysis can be deleted by [Delete].
Click [Select data files for Analysis] and link files to Analysis.
Enter file attributes and associate them with Analysis. When entering file attributes by uploading a tsv file, enter “Analysis” in the leftmost “Run/Analysis” field to mark the files for Analysis.
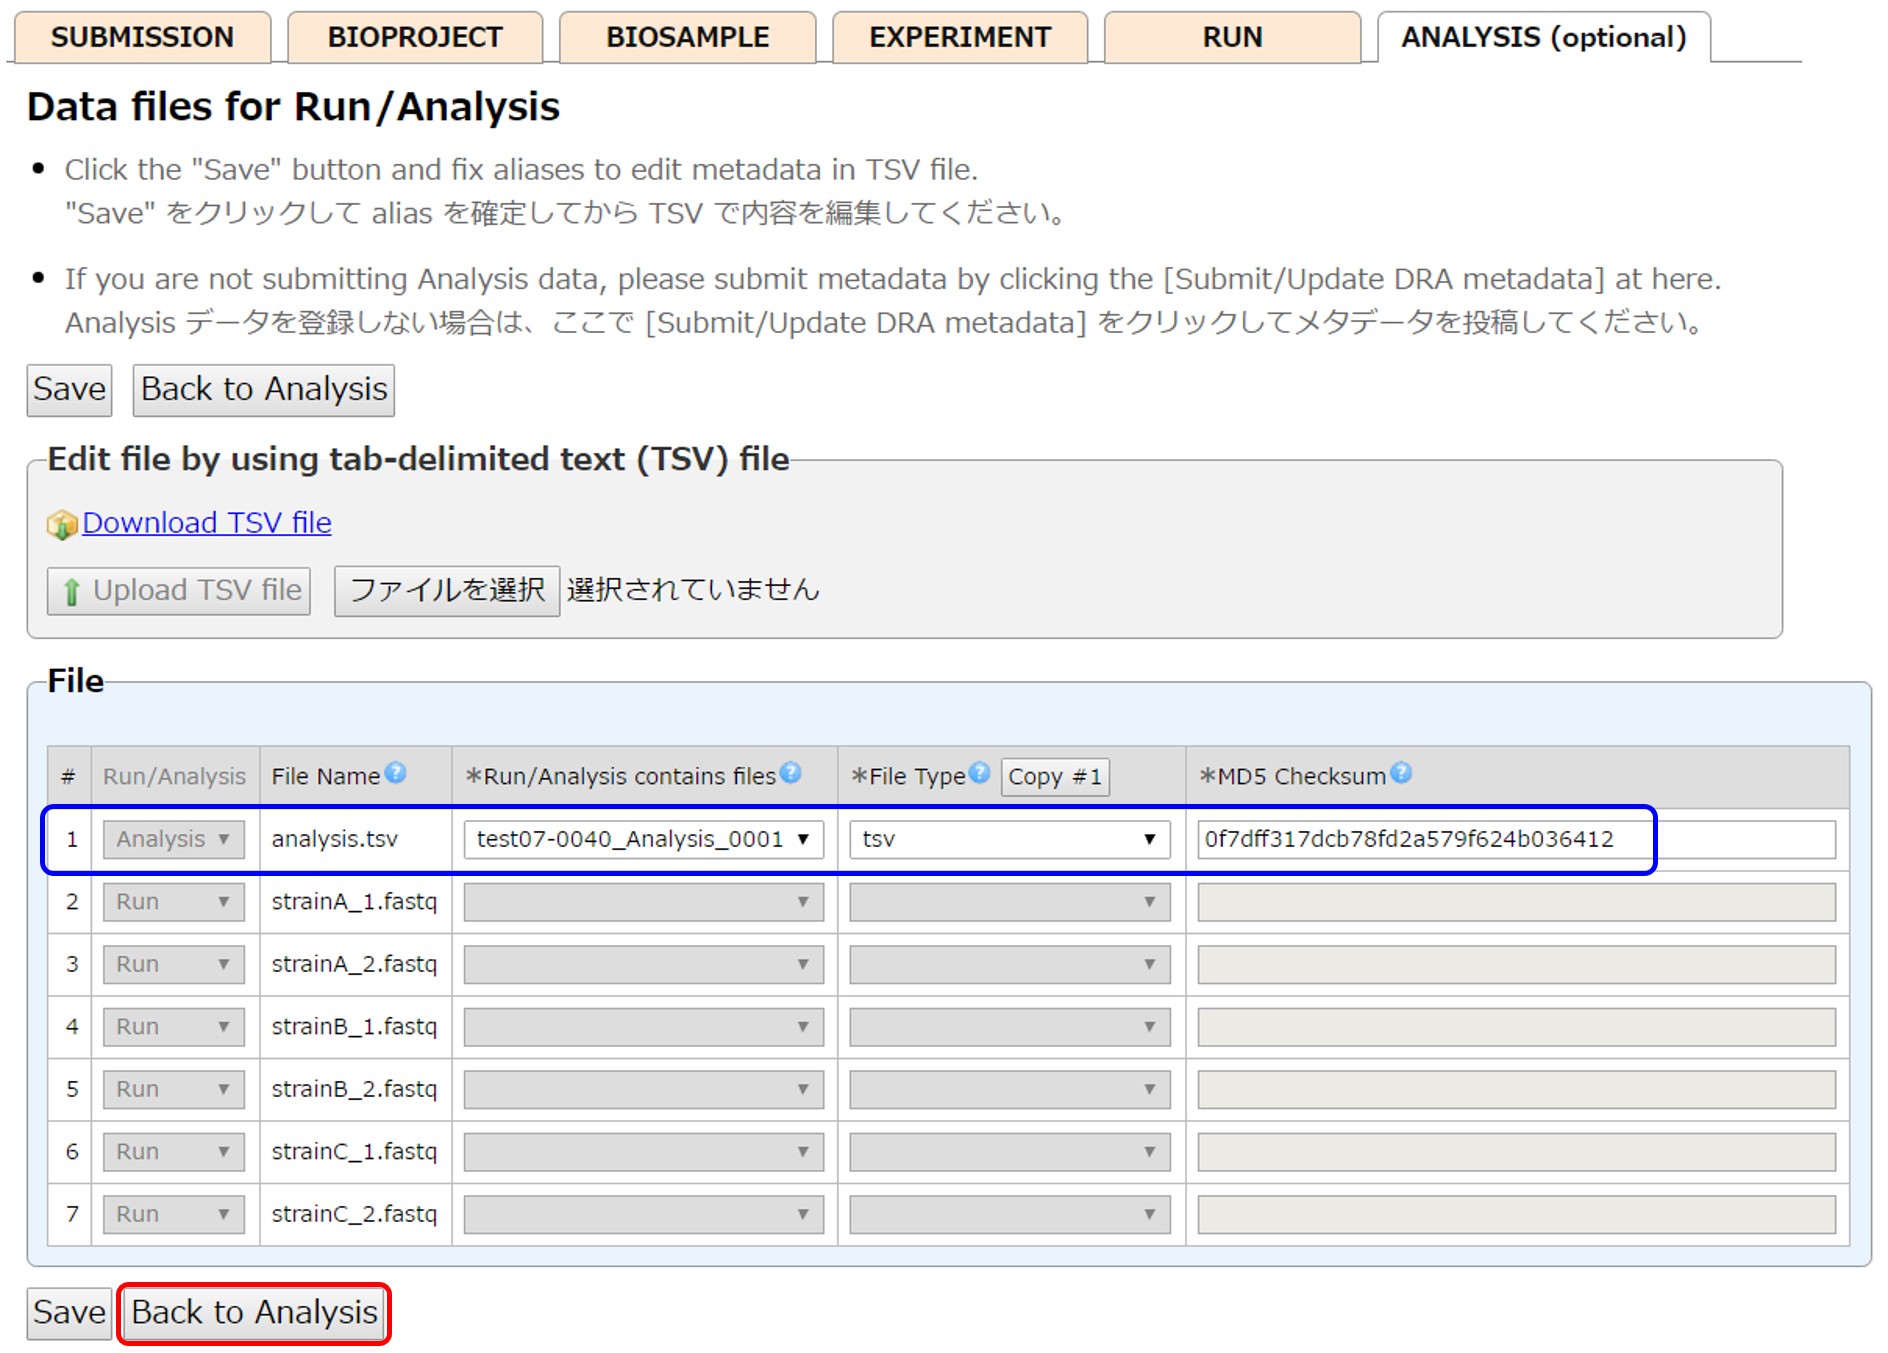
Submit DRA metadata by [Submit/Update DRA metadata] and proceed to data validation process. Only MD5 of analysis files are checked during the data file validation.
Excel-based submission
Compared to the web tool, you can register metadata by once uploading XML files and can avoid web page transitions.
Before filling in the excel, you need to finish the followings.
Download the DRA metadata excel and describe your metadata.
Next, generate XML files by command lines as follows.
Send the excel with the DRA submission ID by an email attachment if you are not familiar with command line operations. We generate XMLs and register them instead of you. Please check the metadata and proceed to the data file validation step.
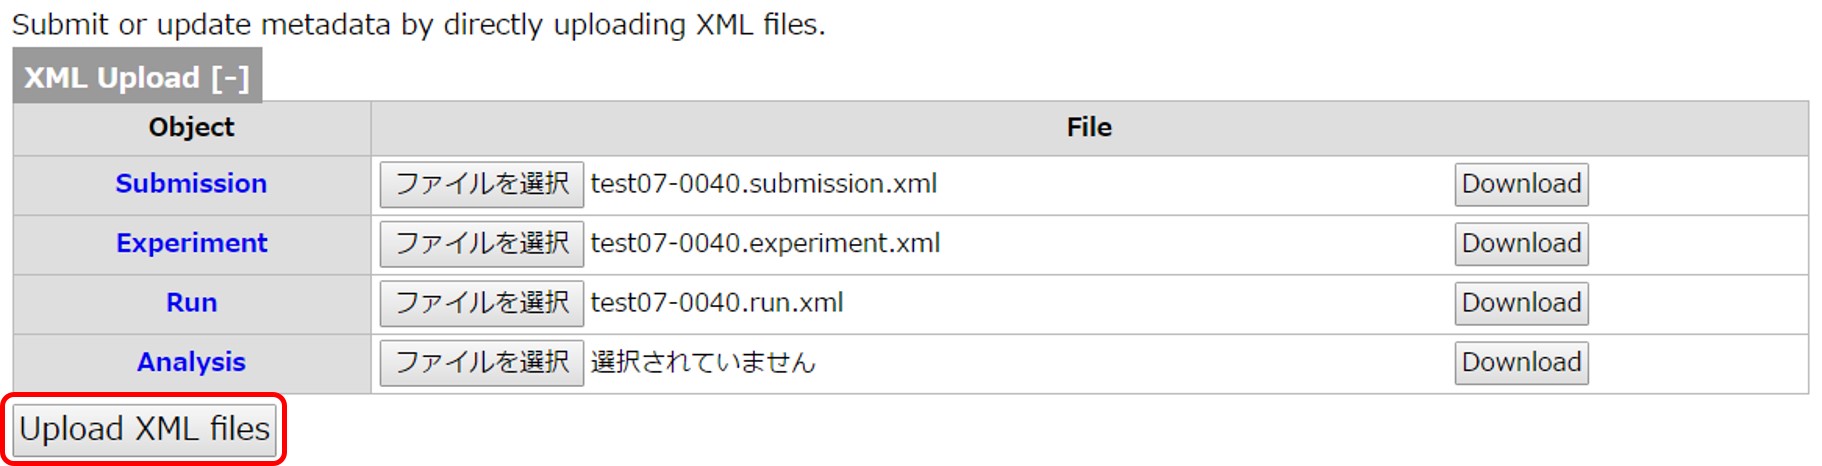
Generate Submission, Experiment and Run XMLs by using the command line tool according to GitHub.
To add XML elements not covered by the web tool nor the excel such as technical reads, please refer to metadata XML examples.
Login D-way and move to the DRA submission page. Following is an example of uploading the Submission/Experiment/Run XMLs to the DRA submission “test07-0040”.
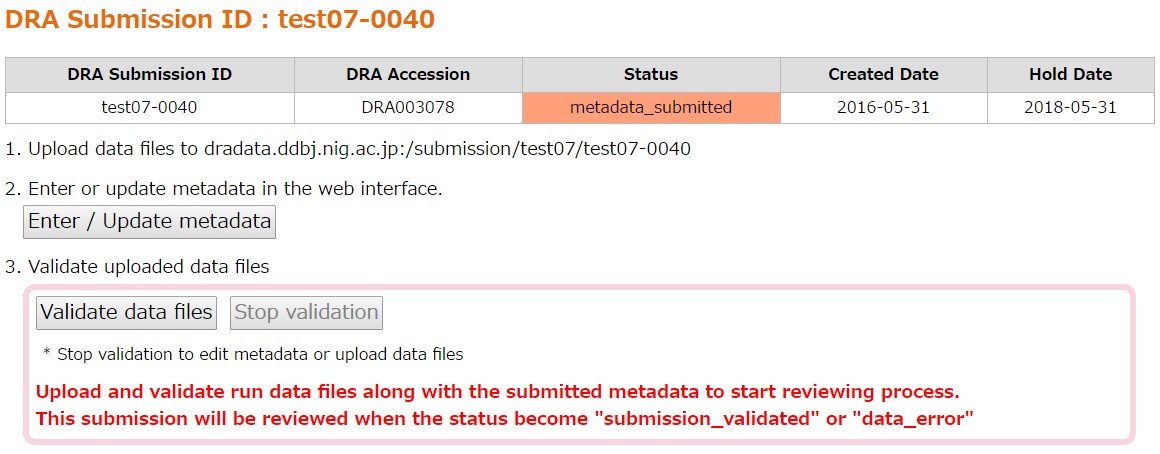
Data file validation
Checksum, format and content of the data files are validated.
In “Data Files”, filenames and md5 values of the metadata and the uploaded files are displayed.
[Validate data files] is clickable when all files described in the metadata have been uploaded. Uploaded files not described in the metadata are ignored.
Click [Validate data files] and validate the uploaded files.

MD5 Check
Matching between the MD5 values in the metadata and those of the uploaded files is checked. Unmatch cause an error. The MD5 value of the file in your local computer are the same with that of the metadata, the file may be corrupted during the file transfer. Please re-upload the file. When the values in the metadata are wrong, revise the metadata at [Enter/Update metadata].
Data Check
The file format and content are validated. If there is no errors, the submission status becomes “Submission Validated”, and the files are moved to a separate directory.
The DRA staff reviews the “Submission Validated” submission. Please do not touch the submission until the DRA staff contact you.
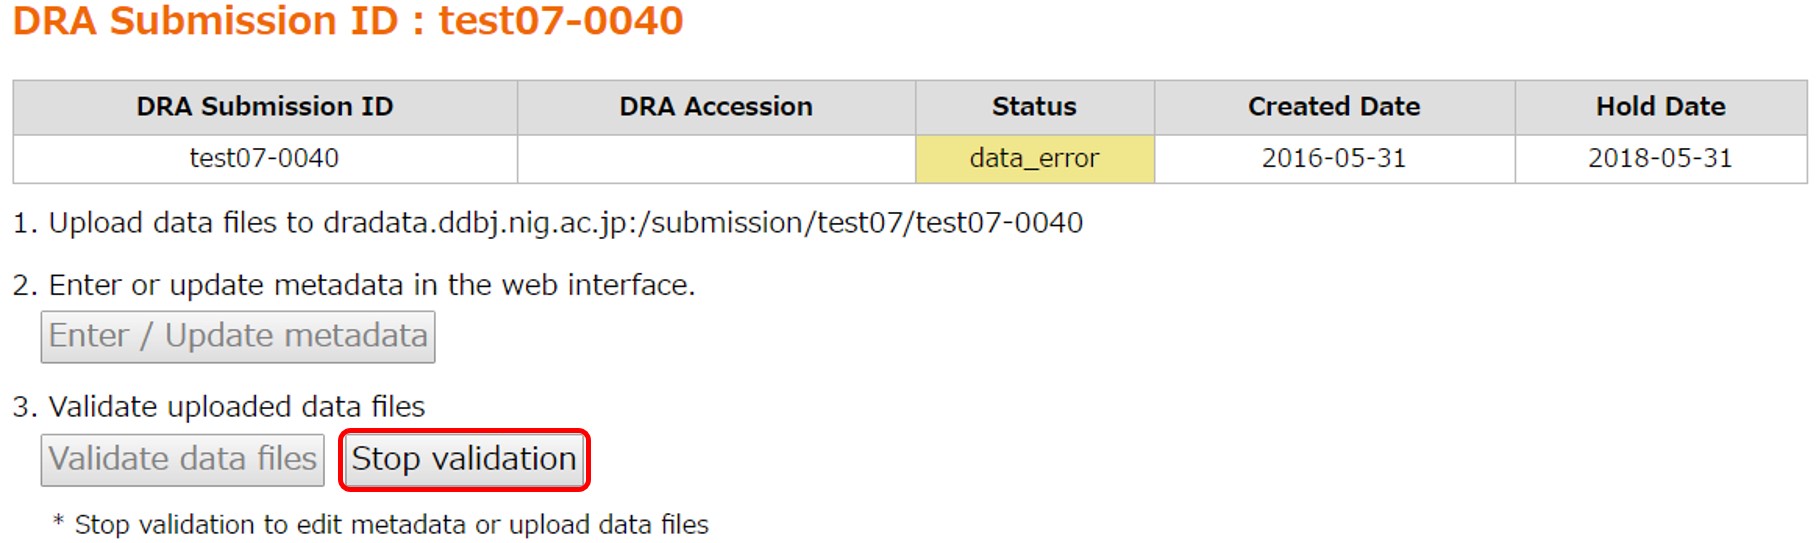
Data Error
An error in the data file validation make the submission status “Data Error”. Please see FAQ: How to deal with validation errors in the DRA submission? regarding how to fix errors. [Stop validation] makes the submission back to “Metadata Submitted”. Then revise the metadata and/or re-upload the files and start the data file validation again by [Validate data files].
Accession numbers
When the metadata and the data files are complete, accession numbers are assigned to the metadata objects and informed to the submitter by email. The accession numbers are also displayed in the submission page.
- Experiment (prefix DRX)
- Run (prefix DRR)
- Analysis (prefix DRZ)
Regarding how to cite the accession numbers, see “FAQ: Which accession numbers should be cited in publication?”.
Data release
Please see DDBJ and SRA Data Processing for data processing and status.
The DRA submission is released according to our data release policy.
Please see “FAQ: How are linked BioProject/BioSample/sequence data released?” regarding how linked data are released.
After the release, the files are distributed at ftp, the metadata are indexed by DDBJ Search and the data are mirrored by NCBI SRA and EBI SRA in a few days.
Access to registered files
To allow the submitter to access and check the archived fastq/sra files, these files are copied to the directories of the submitter’s area of the file server (ftp-private.ddbj.nig.ac.jp). To save the disk space, the copied files will be deleted in one month.
- /report/dra/(DRA submission accession)/fastq/
- /report/dra/(DRA submission accession)/sra/
Example: /report/dra/DRA000001/fastq/DRR000001.fastq.bz2
Update
To change hold date, update metadata and add/delete data, please see DRA Update.